Showing posts with label hero arts. Show all posts

Tuesday, 17 July 2012

Embellies with a Twist at TCC - Make it Wet!

Our Monday challenge Embellies with a Twist is "Make it Wet" - Rain, pool snow etc.

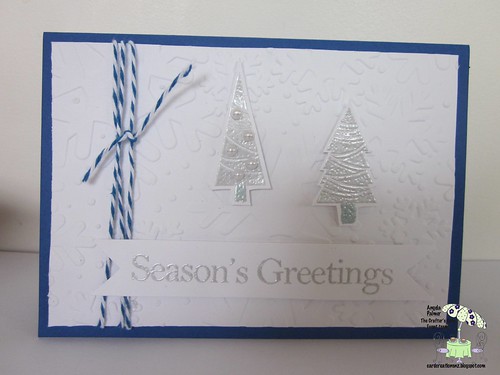
This was a challenge for me at first as a lot of my stamps relate to flowers, butterflies - spring and summer etc.  I do have some stamps and embossing folders with snow, so I decided to go for a card with snow and create a Christmas card.

IMG_2590 Snow Christmas card

Here is my creation.  I have gone for the textured "snowflakes" in the background.   Usually I would matt the sentiment banner onto blue card rather than adhere it straight onto the white, but I thought this may be okay against the textured background.  I would appreciate your comments on which you think would be better.

Supplies:
Stamps: The Crafts Meow, Sentiment - Hero Arts Seasons of Joy
Embellishments: Twine, pearls,
Other: Sizzix snowflakes embossing folder, silver embossing powder, Versamark ink, dimensionals
Card Stock: Royal blue and white 

Thanks for dropping by and for your comments.

Angela

Monday, 9 July 2012

90 Minute Scramble

In case you are wondering, there is no post this week for The Crafter's Cafe - Embellies with a Twist.  Some changes are being made to the forum, so last week's challenge is being extended for another week.  So you still have a chance to take part in our "red, white and blue" challenge.

On Sunday morning at 7am (New Zealand time) I was able to take part in another Hero Arts Flickr Group 90 minute scramble. Something I haven't been able to do for a few weeks.  It was hosted by Ger (Cards n Chocs) from Ireland.  Her challenge was "Encouragement" with an optional challenge of masking. Masking is something I hardly do, so I thought I would give that a try.  You can see Ger's wonderful inspirational card, and the other cards that were created here.

Here is my first card.
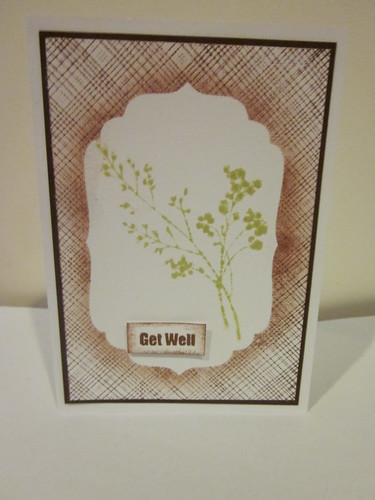
Get well

I cut a spell binder label and masked off the centre of my card and then stamped with the Hero Arts envelope stamp, and sponged around the edge of the masked off area.  I stamped the branch stamp in the middle with Shabby Shutters distress ink.  I added my sentiment in the same colour ink, but it was hardly readable so I had to restamp it in brown onto another piece of card and add it with dimensionals.  I matted my image onto brown card.


Here is my second card. 

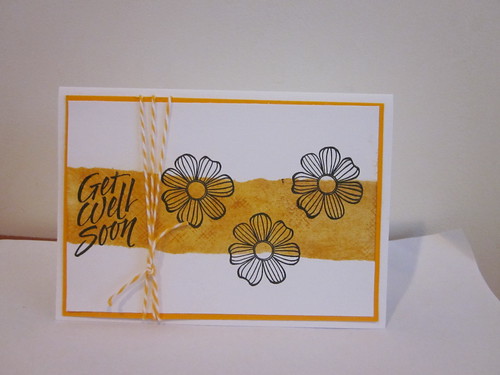
 Get Well Soon
This time I masked the top and bottom of the card and inked the middle part with wild honey distress ink.  I tried stamping the envelope stamp over this, but it hardly came out.  You may be able to just see it in parts.  I then stamped the Hero Arts Flowers and Get Well Soon sentiment in black versafine ink.  I matted it onto a similar colour in the background.    I wondered about doing something with the centre of the flowers, but I didn't know what and I was running out of time so lastly I added the twine as I feel it needed something else.

Thanks so much for dropping by and for your comments.

Have a great week.

Blessings,
Angela

Thursday, 28 June 2012

Purple and flowers

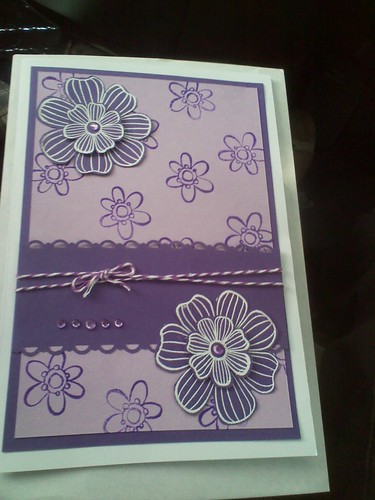
I nearly forgot to take a photo of today's card.  I remembered in the car just before I had to take it inside ready for everyone to sign.  I manged to take a quick photo in the car with my phone, so not the greatest picture.

This is a larger sized card.  I needed a thank you/farewell card to give to one of our church "Music Box" team members who is moving on from our team since her son is off to school soon.  "Music Box" is what our church calls "Mainly Music" - a music and movement seesion for preschools with their mums/caregivers.  Lots of songs, actions, and props (shakers, ice cream containers as drums etc)  The children love it and have lots of fun.  I enjoy helping out and my 16 month old likes to take part too.  She just loves music.  I needed to make a big card so we had room for us all to add our farewell wishes.  I decided not to put a sentiment on it.


IMG_20120627_085425

My first challenge was finding a background stamp big enough.  Even stamping two rows of the envelope stamp was not quite big enough so I remembered Dawn's background technique and created my own with the small flower stamp.  (Thanks Dawn)  Once again another card  of mine with layers.  (Something I seem to like doing in my cards).  I recently looked back at the cards I have been making over the past few months and there tends to be a theme of lots of flowers and dry embossing - I think I like the texture that creates. 

Anyway, back to today's card.  I matted this flower created background onto a darker purple card.  I white embossed two larger flowers and two slightly smaller flowers.  I fussy cut them and layered them too. Before I adhered my matted background onto the white card I added the purple panel with the punched scalloped edges and added the twine.  Finally I added the gems. 

Supplies:
Large card approx 6"x8"
Stamps: Small flower (used to create the background) Paper Salon PS1334E15, HA Four flowers CG290
Other: Twine, white embossing powder, embossing ink, gems, SU scalloped edge punch
Cardstock: white, lilac, purple
Thanks for dropping by and for your comments.
Angela

Monday, 25 June 2012

Embellies with a Twist at TCC - Circles


"Circles" is the theme for the "Embellies with a Twist" Monday challenge at The Crafter's Cafe.

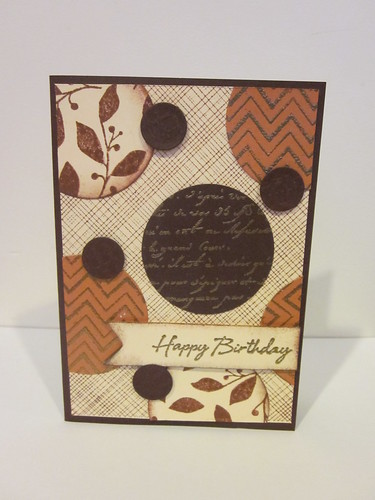
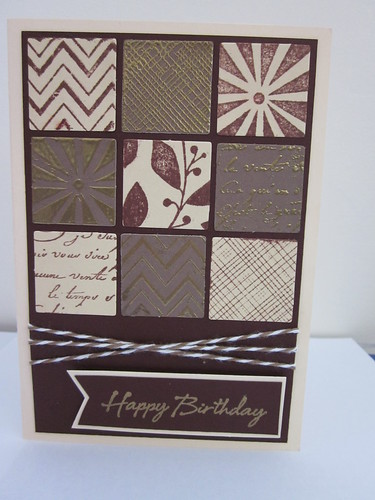
I chose these colours so it would be more a masculine card.   It also uses the June sketch from Hero Arts.   The first card had the plain cream background.  I wondered if the card needed something more to it, so I made a second card and added the envelope stamp in the background.  Please let me know which one your prefer.


Circles without background


Circles with background

Supplies:
Stamps: Hero Arts - Envelope stamp S5507; Zig zag stamp CG422; Old french writing H2365; Branch background CG122; Happy Birthday C5594          
Other: Sizzix plaid embossing folder, gold embossing powder, embossing ink, Chocolate Impress ink

Cardstock: cream, copper, mulled wine 


Thanks for stopping by and for your comments.

Have a great week.

Angela


Monday, 18 June 2012

Embellies with a Twist at TCC - Layers

This week's challenge at The Crafter's Cafe is to make a card with layers and of course include embellishments.  We would love you to take part and join us with this challenge.  Remember that you do need to register and become a new member of the forum if you wish to take part.  I forgot to log in first last week and so my card appeared as a guest.  I will remember from now on.

I often like to include layers, so I had lots of fun with this challenge.  Here is the card I created, using purples, one of the colours I really like to use in my cards.

IMG_2477

To create the background I stamped the flower in black ink onto the purple card (Thanks Dawn for sharing this technique of creating your own background).  I embossed the lilac card and cut a panel and adhered it to the purple card and added the ribbon.  I printed my image, coloured it with copics, added the Hello sentiment.  I then matted it onto the dark pink card to match the main colour of the card.  Lastly I added the kindy glitz. 

Supplies:
Image: The Stamping Boutique - Flower Cart (On sale for $2 instead of $3)
Stamp: Flower stamp from Simon Says (from a  goodie bag prize from A Blog Named Hero, HA Hello stamp
Ink: Versafine black ink
Cardstock: Purple, lilac, bright pink, white
Other: Cuttlebug floral screen embossing folder, ribbon, kindy glitz, copics

Thanks again for stopping by.

Have a great week.

Angela

Monday, 9 April 2012

Shaped Cards

I had fun with the Hero Arts technique challenge for this month which is shaped cards.  I have seen some beautifully made shaped cards from time to time and have thought I should make some, but I didn’t quite understand how to make them.  I enjoyed watching Shari Carroll's technique video and learnt what to do.  The idea of cutting a bit of the bottom off the card at the back to make it stand up straighter is a great idea.  I learnt the hard way that it is better to cut it off before you stick the front and back together, that way you can line up what you are cutting off with the fold at the top of the card and it stands up straight.

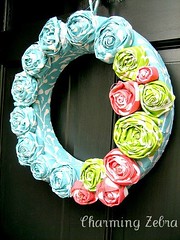
My first card was part of the Hero Arts 90 minute scramble.  I used the colours from the photo below.  I got the idea of the circle card from the wreath shape.


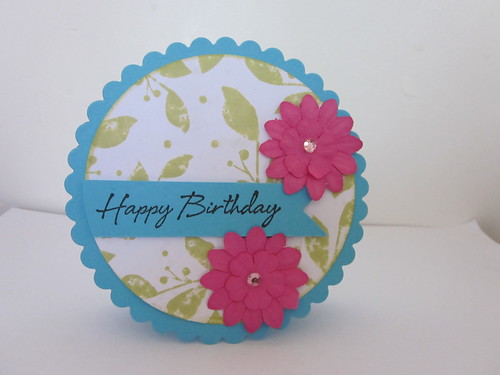
This is one of my cards for the 90 minute scramble.  I made another card using the same colours.  

Blue, green and pink shaped card

Supplies
Ink: Distress ink, Versafine black
Stamps: Branch background
Cardstock: blue, white
Other: pink flowers, gems, Spellbinder scallops and circles (classic one I think)
I enjoyed making it so much, I decided to make two more.  I also showed my 13 year old niece and 5 year old daughter how to do it and they make a card or two each too.

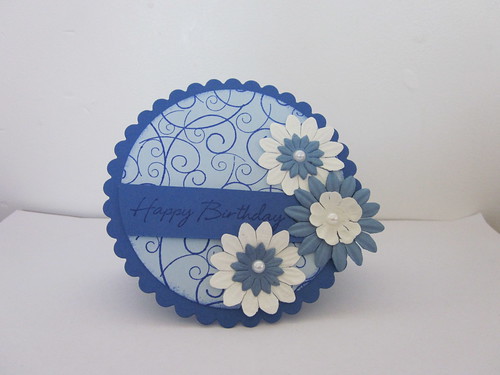
My second card:
Blue shaped card

Supplies
Ink: Ultramarine impress ink,
Stamps: Swirl stamp
Cardstock: Dark blue and light blue
Other: White and blue flowers, pearls, Spellbinder scallops and circles (classic one I think)

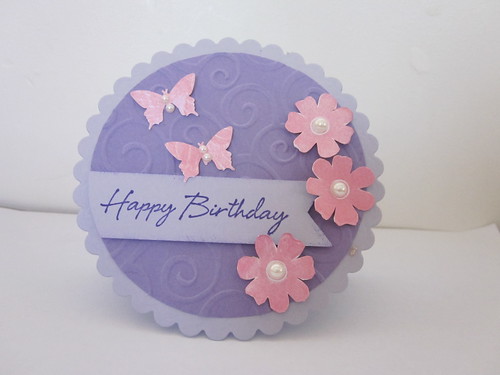
My third card:
Pink and purple shaped card

Supplies
Ink: Lilac impress ink, Archival Brilliance Aurora (just used the pink),
Stamps: Ha 4 flowers (smallest flower) CG290. HA Happy Birthday C5594
Cardstock: Purple and lilac
Other: Cuttlebug d’vine swirl folder, pearl, Spellbinder scallops and circles (classic one I think), butterfly punch

I am entering this last one in the A Blog Named Hero first challenge.  I love these flower stamps and have made lots of cards using them.
I really enjoy using my cuttlebug and so I am entering this in the Simon Says Stamp challenge - Use your favourite tool.

Thanks so much for dropping by and for your comments.  


Angela

Saturday, 7 April 2012

13th birthday card

This is my second post for the day.  Just a quick one.  Click here to see my other post for the day.

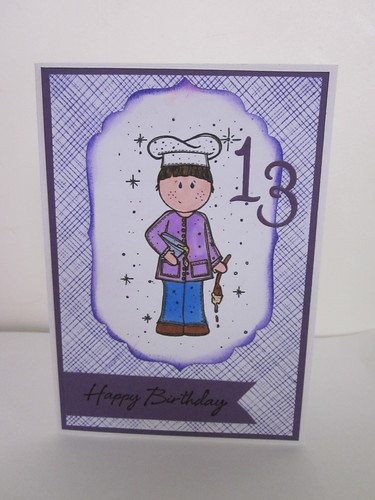
Here is a card I made for my niece's 13th birthday.  She enjoys baking so I chose this image.

Chef 13th birthday card

The image is from Stamping Boutique coloured with copics, but I have also used one of my favourite Hero Arts stamps - the envelope stamp.  Such a great background stamp.


I am entering this in the challenge A Blog Named Hero's first challenge - using your favourite Hero Arts products.

Supplies:
Ink: Lilac impress ink, Versafine black ink
Digi Stamp: AJ Chef
Stamps: Envelope stamp S5507, HA happy birthday greeting
Cardstock: white, purple,
Other: Labels die cuts, cuttlebug number die cuts


Thanks for dropping by. and for your comments.


Angela

Friday, 30 March 2012

CAS-ual Friday - Pastels and black

Hi and welcome,
 
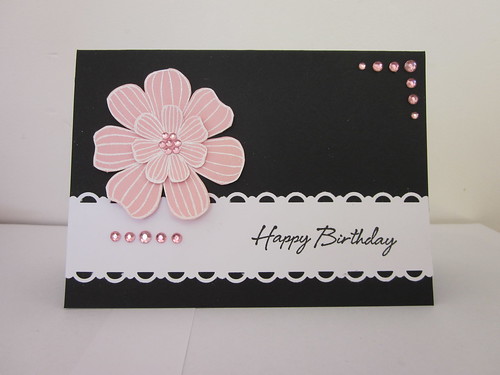
My card today is for the CAS-ual Friday Challenge CFC45 - The Bold & The Beautiful - Pastels and black. I chose to work with pink as my pastel colour.

I am also entering this in
Simon Says Challenge - Anything Goes 
Lollipop Crafts Challenge #73 - Anything Goes

IMG_2193

Yet again I have used two of the flowers from the Hero Arts 4 flower cling stamp set.  I have certainly made great use of this stamp this month, especially with one of the features the Hero Arts monthly challenge being to use flowers.

Supplies
Ink: Embossing ink, Black Versafine
Stamps: HA 4 flowers, HA Happy Birthday
Other: Detailed white embossing powder, Stampin' Up scalloped punch, pink gems
Cardstock: pink, white and black

Thanks for dropping by and for your comments which are always so much appreciate.

Have a great weekend.

Angela

Friday, 16 March 2012

Challenges over at the Lily Pad

Over the past couple of days I have wanted to take part in the challenges at Lily Pad Cards.  For some reason I ended up leaving it to the last minute, but I did make it in time. 

My first card was for the Lily Pad March Card Chain Challenge.  Not so many entries this time.  It is fun to take part in this challenge because you get to receive a card in the mail.  If you like to send and receive cards, I would encourage you to take part next month.  Here is the card I made.

Yellow and pink flowers - Friendship

This card shows my third attempt at the Velveteen Stamping technique which is one of the technique of the month for the Hero Art's March Challenge.  This time I remembered to blot it once I had stamped the flowers, but it hasn’t turned out as well as some of the cards I have seen, so perhaps it is just because it is old ink.  I think I will need to eventually invest in some new white ink. 

I stamped the background in white ink with the branch background stamp. Once this was dry, I stamped the flowers in pink and yellow.  I framed this with the hot pink card, added the twine and then I attached this to the white card which I had sponged with pink ink around the edges. 

The sentiment is computer generated.  I also framed this in hot pink card. I added my other embellishments – buttons, pearls and gems.

Ink: Archival Brilliance Aurora (used the pink and yellow), White pigment ink,
Stamps: Hero Arts 4 flowers (CQ290), Branch background (CG122)
Other: Pink and white twine from Bakers Twine, buttons, Pearls, Pink gems,
Cardstock: Hot pink and white


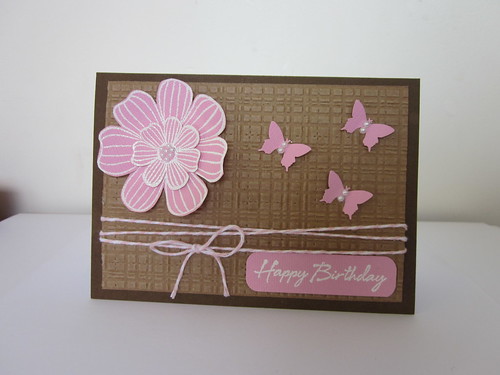
My second card is for the Kathy's Lily Pad Palette Challenge sponsored by Purple Onion Designs.  I really like this colour palette with the browns and pinks and I went out last weekend to buy some card especially for this.  I think I will use this colour combination again soon.  I am also entering this in the Penny Black and More March Challenge - Spring time.

Pretty in Pink


I cut my light brown card to size and dry embossed it with my new plaid embossing folder.  I love the texture this creates.  (It will be a good background for male cards too.)  I added the twine and then mounted this on the chocolate brown card.  I white embossed the flowers onto pink card, cut them out and mounted it onto the card, curling the petals inwards a little (although hard to see in the photo).  I added small pearls in the centre of the flower.  I also white embossed the sentiment, cut it out and used my corner punch to round the edges. To finish it off, I punched some butterflies, and attached them to the card with glossy accents and added pearls to them too.

Stamps: Hero Arts 4 Flowers (CQ290) Hero Arts Happy Birthday
Ink: Embossing ink
Other: Sizzix plaid embossing folder, detailed white embossing powder, pink and white twine from Bakers Twine, pearls, butterfly punch, corner punch, glossy accents
Cardstock: Light brown, chocolate brown and pink


Thanks so much for your comments.  I do really appreciate them.


Have a great weekend.


Blessings,
Angela


Wednesday, 14 March 2012

Pink flowers and butterflies

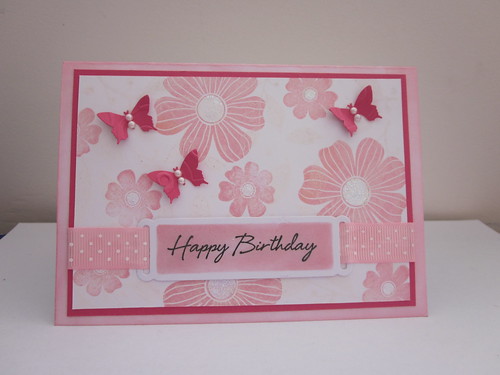
Here is another attempt at the Velveteen Stamping technique. I still don’t think I have quite perfected it yet and I hope to try again, but I still like the overall look of this card.  
Pink flowers and butterflies

My white pigment ink is quite old, so I am not quite sure if that is why it looks more of a cream colour and I also forgot to blot it once I had stamped the image (I assume this is to help the white image show through better).  

I stamped the background in white ink with the branch background stamp. Once this was dry, I stamped the flowers in pink.  I framed this with the hot pink card and then attached this card which I had sponged the edges of my white card with pink. 

I cut the tag, left the die in and inked the middle of it.  I then removed the die and stamped the Happy Birthday image in black and added it to the card with the ribbon.  I added some butterflies and kindy glitz.  My butterflies seem to be my favourite embellishment at the moment.  I punched the butterflies from the hot pink card that I had dry embossed with the Divine swirl folder.  I added some pearls to the butterflies which I felt just finished them off.

Ink: Archival Brilliance Aurora (just used the pink), White pigment ink, Versafine black
Stamps: Hero Arts 4 flowers (CQ290), Hero Arts Happy Birthday, Branch background (CG122)
Other: Pink and white ribbon, Kindy glitz, Pearls, Butterfly punch, D'vine swirl cuttlebug folder,
Cardstock: Hot pink and white

Thanks for dropping by and for your comments.

Blessings,
Angela

Monday, 5 March 2012

My first attempt at the Velveteen stamping technique

Today's card is for the Hero Arts March challenge.  It has flowers on it and I also wanted to make a card using the Velveteen stamping technique.  I had watched Shari Carroll's video a couple of days ago and I was trying the technique from memory.  It wasn't until after I made it, I realised that I didn't quite follow her instructions properly.  


Pink, yellow and orange flowers

I white embossed the Old French writing image first (instead of just stamping it with white pigment ink),  Then I stamped the flowers on top of this. (I will have to make another card and try the technique again.)  I mounted the stamped image onto hot pink card.  I added the twine and the sentiment also edged in the hot pink card.  I added some butterflies punched from the hot pink card that I had dry embossed with the D'vine swirl cuttlebug folder.  I sponged the edge of my white card with the pink ink and mounted the stamped image onto this.   Lastly I added kindy glitz to the centre of the flowers.
This card is larger than what I usually make as I need a bigger card so there is enough for many people to write their birthday greetings. It is approximately 6" x 8".


This is also for the Simon Says Stamp - Anything Goes Challenge
Supplies:
Ink: Archival Brilliance Aurora (three colours - yellow, orange and pink), Embossing ink


Stamps: Hero Arts 4 flowers (CQ290), Hero Arts Happy Birthday, Old French Writing (H2365),


Other: white embossing powder, kindy glitz, twine, butterfly punch, D'vine swirl cuttlebug folder


Cardstock: Hot pink and white


Thanks for stopping by and for your comments.


Have a great week.


Angela

Sunday, 4 March 2012

Sue's 90 minute scramble

This morning (NZ time) was the Hero Arts Flickr group 90 minute scramble hosted by Sue.  Sue's challenge for us was to create a card using at least 3 inchies. Here is the link to the scramble.

I only had 45 minutes to make my card before I headed to church this morning.  I thought I would go for the brown, gold and neutral colours and make a masculine card.  This is what I managed to make in that time, as well as take a photo and upload it. 


Inchies for 90 minute scramble

Supplies:
Stamps: All from Hero Arts
Envelope stamp S5507
Zig zag stamp
Pinwheel stamp E4216
Old french writing H2365
Branch background CG122
Happy Birthday (C5594)

Inks: Versamark, Impress chocolate ink,
Other: gold embossing powder, twine, inchies (pre-cut - thankfully)


I am also entering this in the Simon Says Stamp - Anything Goes challenge

Thanks for stopping by and for your comments.

Angela

Saturday, 3 March 2012

Finally time to use my new stamps

Hi,

I haven't had as much time as I would have liked over the past month for making cards and I only just realised yesterday that I never got around to making a card for the Hero Arts February challenge.  I wanted to make sure I entered something in the March challenge, so last night I made this.  I like cards with flowers and I finally got to use one of my new stamps - the zig zag background stamp.  I have also bought the London background stamp so I look forward to using that one sometime soon too.

Here is my creation using the zig zag stamp:

Zig zig and flower

This is for the following challenges:
Hero Arts March Challenge - This card includes the feature of "Fabulous Flowers - Let your creativity bloom and include one or more flowers on your project!"
Simon Says Stamp Challenge - Anything Goes

Supplies:
Ink: Archival Brilliance Aurora (three colours - yellow, orange and pink), Versafine black
Stamps: Hero Arts Zig Zag (CG422), Hero Arts 4 flowers (CQ290), Hero Arts Happy Birthday (C5594)
Other: Stem and leaves made from green textured paper, gems coloured with black copic marker
Cardstock: Baby pink, hot pink and white
Firstly I used a brayer, rolled the three inks onto the zig zag stamp, stamped it onto white card and cut it to size. I mounted this onto hot pink card and then onto the baby pink card.
I sponged pink ink onto some white card and stamped the larger flower. I then sponged the yellow ink and stamped the smaller flower. I cut both of these out. I also sponged some more yellow for the Happy Birthday sentiment. I cut the stem and leaf out of textured green thick paper. I mounted this, the flower and sentiment onto the zig zag background and lastly added the black gems to the middle of the flower.


Here is my second card.
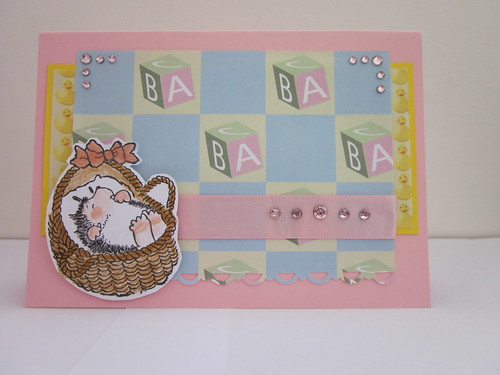
Hedgehog in a basket

This is for the challenges:
Card Patterns - Sketch 154
Simon Says Stamp Challenge - Anything Goes

Supplies:
Patterned Paper: Baby and yellow duck patterned paper (Sorry I don't know where it is from)
Stamp: Penny Black - Basket of Joy
Cardstock: White, yellow and baby pink
Other: pink gems, pink ribbon, Faber Castell coloured pencils. Stampin' Up scalloped punch, glossy accents


This uses the sketch from Card Patterns.


Thanks for dropping by and for your comments.

Enjoy your weekend.

Angela

Thursday, 16 February 2012

Brown Tones

Two cards that I have made I have using brown tones.

The first card is for the Clean and Simple Challenge #176 using this sketch.


IMG_2059

I decided to make a masculine card and that is why I went for the brown tones.

I gold embossed the envelope stamp and the old french writing on to brown card, and dry embossed the d'vine swirls and diamond plate onto copper card and cut them into squares.  I mounted them onto a fawn/cream card than I had punched the scalloped edge on and mounted this onto brown card.  I then mounted it onto white card that I had distress inked with walnut stain.  I gold embossed the Happy Birthday sentiment.

Supplies
HA Happy Birthday stamp
HA Envelope stamp
HA Old French writing stamp
Gold embossing powder
Ink: Distress ink - Walnut stain
Cuttlebug embossing folder - D'vine Swirls & Diamond Plate
Stampin' Up scalloped edge punch

My second card includes some pink as this is the colour palate for the Lily Pad Cards - CCC - Card Chain Challenge


CCC Butteflies

Supplies:
HA Envelope stamp
HA Happy Birthday stamp
Cuttlebug embossing folder - D'vine Swirls (on the pick butterfly)
Ink: Impress Chocolate ink
Cardstock: Brown, fawn, pink
Punch: Scalloped edge from Stampin'Up


A fairly CAS card. 


Thanks for dropping by and for your comments.


Angela

Sunday, 5 February 2012

"Heart and Soul" 90 Minute Scramble

I enjoyed the Hero Arts 90 minute scramble this morning, even if it was at 4am New Zealand time.  The good thing was the house was quiet and I could enjoy making cards with no distractions.

The challenge was hosted by Marcy and the theme was “Heart and Soul”.  We had to create a card/project using a heart in any way other than simply stamping on our paper.  I had lots of fun with this one.

In the Hero Arts Valentine exchange I was sent a beautiful card which inspired my with my creations for this challenge.  You can see the wonderful card Martha sent me here.

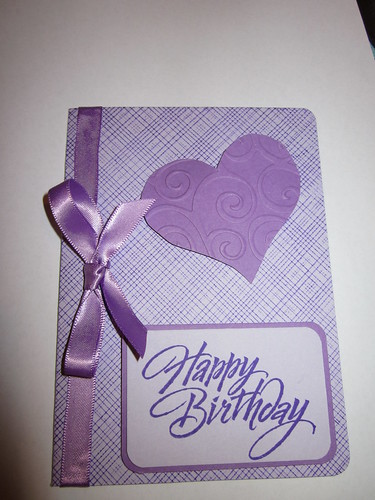
My first card:  I have CASED the card from Martha and used purples and instead of an embossed pattern on the heart I have used a dry embossed pattern.
Swirly heart

The stamps I used:
Hero Arts Happy Birthday greeting E1119
Hero Arts Envelope Pattern S5507
Also used the cuttlebug swirl folder

I stamped the background in the envelope pattern in lilac impress ink. I then dry embossed the swirl pattern on to purple card and cut this out into a heart shape. I stamped Happy Birthday onto lilac card and mounted this onto purple card to border it. I corner punched the corners of the sentiment and mounted it on the card. I added the purple ribbon.


Here is my second card:  I have used the red colour like the one from Martha and the clear embossed technique on the hearts, but the design is a little different.

Two hearts

The stamps I used:
Hero Arts Branch background CG122
Hero Arts Old French Writing H2365

I stamped the words background stamp in fired brick distress ink onto cream card and corner punched the corners.  I clear embossed the branch background stamp onto red card, cut out two heart shapes and mounted it on the card.   I added the red ribbon.  I mounted the background onto red card and corner punched the corners.

If you would like to see all the other wonderful cards that were made for the 90 minute scramble, click here.

I had a lot of fun with this challenge.  A big thanks to Martha for such a great challenge. 

Enjoy the rest of your weekend.

Thanks for your comments.

Angela
Friday, 20 January 2012

Hearts, hearts and more hearts

Just to warn you, today's post is a little longer than usual with three new cards that I have made over the past few days.

A lot of challenges at the moment have the theme of Valentines Day, love, hearts etc, so all the recent cards I have made are of that theme.  I don't have a huge collection of love or heart type stamps, so I have mostly used my Hero Art Ribbon Heart stamp (C2041).

The first card is a rather simple design. 
This is for the Hero Arts January Challenge (Love & Hugs & Kisses)

3 Hearts
I stamped the cream background card with the Hero Arts envelope stamp. I gold embossed the three hearts with the Hero Arts ribbon heart stamp onto burgundy paper.  I gold embossed an extra heart, cut it out and mounted it on top of the middle one with dimensionals.  I framed the burgundy paper with cream card.  I gold embossed the sentiment and framed it in the same way.

Here is my second card.
It is for the following challenges:
Card Patterns #148
Die Cut Divas January Challenge Love
Penny Black and More January Challenge - Love and Hearts
Hero Arts January Challenge (Love & Hugs & Kisses)


IMG_1976

I used heart patterned paper from cre8tiv and cut it into four panels.  I used my scallop punch to create the scalloped edge down the left side of the first panel.  I mounted the four panels onto red card.  I added the white ribbon.  I then used my spellbinders circles and scallop die cuts to make a red circle and white scalloped circle.  I white embossed the two hearts (HA ribbon heart) onto the red circle.  (I did many attempts of embossing this until I was reasonably happy with it, and also after trying two different sized circles – so lots of cut circles and embossing!)  The PP already had the white heart on it, so I cut out other from some of the leftovers and mounted that to the top edge of the circle. 

My third and final card.
This is for the following challenges
Penny Black Saturday Challenge Week 184 - Anything Goes
Die Cut Divas January Challenge Love
 
Penny Black Anything Goes


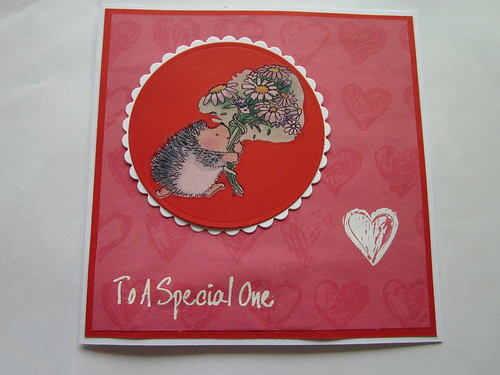
I used some different heart patterned paper from cre8tiv and framed it with red card.  I used my spellbinders circles and scallops die cuts to make a red circle. I added a Penny Black stickeroo to the red circle and framed it with a white scalloped circle.  I white embossed the sentiment onto the PP.

Thanks for taking the time to have a look at my blog and cards.  Please let me know which one is your favourite out of the three.

Have a great weekend.

Angela

Wednesday, 18 January 2012

Gold Embossed Heart

Today's card is for the following challenges
Hero Arts January Challenge (Love & Hugs & Kisses)
The Play Date Cafe Challenge (PDCC114) using Burgundy, Gold and Plum. 
Penny Black and More - January Challenge - Love and Hearts

Hero Arts January Challenge


and The Play Date Cafe Challenge


Gold Embossed Hearts

The stamp is Hero Arts Ribbon Heart (C2041) The sentiment is from a basic stamp set from my local stationery shop. I gold embossed three hearts and the sentiment onto burgundy paper.  I mounted this onto purple/plum card  and added the ribbon and gems.  I then mounted this onto cream card. A fairly simple design.

Thanks for stopping by and for your comments. 

Angela

Friday, 13 January 2012

Two quite different cards

My post today includes two quite different cards.  One is a masculine card and the other a very feminine card.

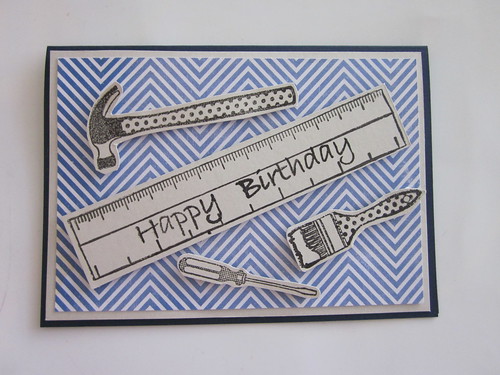
My first card is one I have made for my father in law's birthday and he is a handy man so I thought I would include some tool stamps which are a set from Kaisercraft, the Construckt Collection.  I have used the colours from Kathy's Lily Pad Palette.  My card is also for  Simon Says Challenge, Spots &/or Stripes challenge.  Initially I planned to use just stripes, but when I was added the tools to my card, I realised that the hammer and paint brush had spots on it too.
I am also entering this in The Crafter's Cafe Challenge - Happy Birthday

IMG_1936
I mounted the blue zigzag patterned paper onto grey and then navy card for my background.  I then stamped the tools onto grey card, cut them out and mounted them with dimensionals.  A fairly simple card.

My second card is for the One Stop Craft Challenge #164 - Bingo.  I have used lace/ribbon, diecuts/punches and paper piecing.

IMG_1937

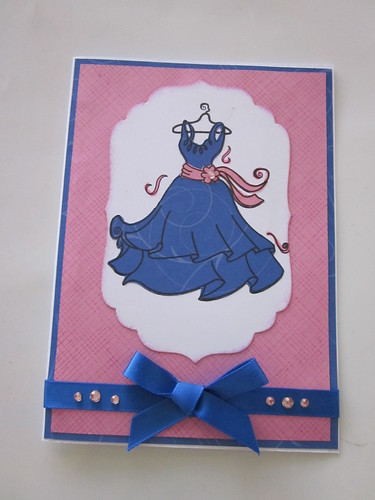
I paper pieced the dress which is a digi image from Tiffany Doodles onto the largest label diecut shape I had.  I inked the edge of the die cut to soften the edges.  I stamped with the HA envelope stamp in Impress lilac ink onto pink paper background (which matches the belt on the dress), and mounted this on the blue paper which matches the dress.  I added the ribbon and pink gems. (Sorry the lighting on the card is not the greatest as it was taken at night.  I will try an get a better picture in the morning).

Thanks for dropping by and I really appreciate your comments.

Have a great weekend.

Angela


Wednesday, 11 January 2012

Chipboard Challenge

Lily Pad Cards has a challenge this month to use chipboard in a card.  I am also entering it in the Penny Black and More @ Allsorts January challenge which is Love and Hearts.

Happy Anniversary card

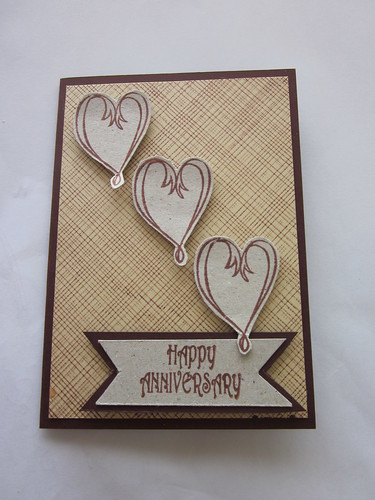
I made this for my husband for our 13th wedding anniversary which was on Monday 9th January.  I wanted to use colours that were appropriate for a male so that is why I decided to use brown and neutral colours.  I used the HA envelope stamp for the background and HA heart stamp.  The sentiment is a foam stamp (not sure where it is from).

Hope you are having a great week.

Angela

Sunday, 8 January 2012

Patterned Paper

Hi,

Happy New Year!

Well is has been a month since I have added a new post to my blog.  I have missed making cards and creating a post, but it was a busy month for me in December with some full time work for a few weeks and then Christmas.  I still got to make a few cards as I needed them for Christmas, including some pocket cards for gift cards, but I never had time to post them here.

Hopefully now I will be able to get back into regular card making and blog posting again and I am looking forward to that.  This morning was also the first Hero Arts 90 Minute Scramble for 2012 which I enjoy taking part in.  It was a great way to get back into creating cards.  I did make another card the other day for my husband for our wedding anniversary which is tomorrow, but I will post that later, in case he see it here before I have given it to him. 

I enjoy the 90 minute scrambles, but it takes a bit of coordinating as it is at 8am on a Sunday morning here in New Zealand.  I need to get myself organised for the scramble, take part in the scramble, get the kids and myself breakfast and also ready for church for 10am.  If you wish to take part, take a look in the Hero Arts Flickr group.  It is a lot of fun and great to see so many wonderful creations in such a short time.  This morning's challenge was set by Karen and the challenge was to use patterned paper.  I have bought various sheets/packs of patterned paper, but I hardly ever use them, so it was a good opportunity to have a go.

This is what I came up with.

Flower card using patterned papers

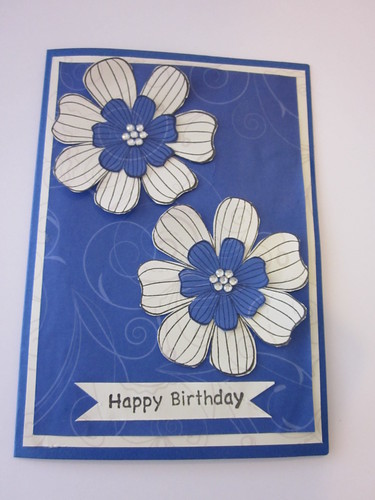
I used the Hero Arts Cling Flower stamps (CG290 Four Flowers). I stamped the flowers onto the patterned paper and cut them out. I also used the same paper for the background. I added some gems and the sentiment to finish off the card.

Thanks again for stopping by and for your comments.  
Angela