Monday 28 May 2012

Embellies with a Twist - The Crafter's Cafe

Last week I made a card for The Crafter's Cafe challenge - distressing.   I distress edged the image and used blue ink to edge it, but I realised later (after I had taken the photo and given the card to the birthday boy) that I didn't really include an embellishments.  Oops!  I also had several days of no internet or home phone and visitors from Japan, so not really any time to make another card or do a blog post.  Hopefully this week things are back on track!

The theme for Embellies with a Twist is "Anything Goes"

My card this week also uses the colours and inspiration from Lily Pad Cards "Vera's View Challenge"
Here is the inspirational photo.


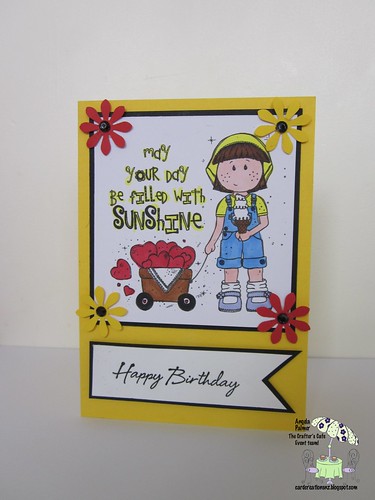
Here is my card for this week and I did remember the embellishments!

HA flowers

Ink: Distress Ink - Shabby Shutters, Impress Ink - Pansy, Archival Brillance - Aurora (just the pink)
Stamps: HA Four Flowers CG290, HA Hello, HA Envelope Pattern background stamp S5507
Embellishments: Liquid pearls, pearls,
Cardstock: Purple, white.

I stamped the background envelope pattern stamp using the shabby shutters ink (although it looks slightly more brown in the photo).  I stamped two of each flower in the green, pink and purple ink and cut them out and put them together.  I inked some white card with shabby shutters ink to frame the patterned background and mounted this on the purple card.  I added the flowers onto the envelope pattern backgournd and added some liquid pearls in the middle.  The background for the "Hello" sentiment is also white card inked with shabby shutters and mounted onto purple card with the pearls added.

Thanks for stopping by and for your comments.

Angela


Saturday 26 May 2012

More of Stamp Camp

Here is some other creations I made at Stamp Camp. This style card would be great if you want to put a few different things inside. 

IMG_2327
IMG_2328

What I really like using in this card was the "Summer Illusion" embossing powder.  It is a orangey/copper colour. I used this on the butterfly (which is on vellum) and the words in the third panel.

Circle Flip It Card:
I really like this flip-its style card.  The card was cut using the new Sizzix circle flip-its card die.  (This was already pre-cut for us).  I really like how the card works and would like to make some more, but at $60 for the die here in New Zealand it is quite expensive!  I see that Jennifer McGuire also made some of these cards on her blog recently. Click here to see her amazing card.  I think it can be made without the die too, so I may have to try that, but I am sure that is a lot harder.

 IMG_2360
IMG_2361

I added lots of embellishments to this card - die cut butterfly, ribbon, flowers, etc.

Hidden message card:

IMG_2332
This card was made with patterned paper stuck together with jac paper.  The card was decorated with lots of flower stickers from one sheet.
The diagonal parts were cut carefully, to allow the contrasting colour pieces to be slid in and create a hidden part which can be opened up. (Sorry a bit hard to explain here)

Here is the hidden message part. 
IMG_2333

Thanks for dropping by and for your comments.

Have a great day.

Angela


Thursday 24 May 2012

Stamp Camp Day 1

Finally a chance to post about some of the cards I made a stamp camp which was a few weeks ago now.  I drafted this post at least a week ago, but I needed some more close up photos.  Once I had the photos our internet and home phone went down for 4-5 days.  Very frustrating!  Once we got our internet and phone up and running again, we have had some friends from Japan visiting us, so no time for my blog.  So here it is now.

Here are some cards I made on Day 1 of Stamp Camp.

IMG_2326

The first card on the left was made using four different embossing folders.  I embossing the brown card, cut it into a square (about 1.5cm squared).  inked the embossed texture, and then framed it with darker card.  I added the string to the bottom square, the brads and flowers to the top two squares and arranging them on the card.  The brown branch was cut out (from a template) but you could easily draw your own.  Lastly it was stamped with Happy Birthday.   Here is a close up of it. 

IMG_2356


White and blue card:
For the second card, the cutting of the dies onto white and blue card was already done for us, so it mainly invovled putting the card together.  (Sorry, I am not sure what the name of the die is.)  Once I had put it together I added liquid pearls and covered them with a glitter.  I love the butterfly die we used on this card.

IMG_2357

Red Flower:
Firstly I cut the white and black card to size and then stamped the flower onto white card.  I also stamped onto scrap white card the flower two more times and the top bud.  Then I put the white stamped card through the cuttlebug, embossed it with swiss dots.  I coloured the flower.  Then I carefully cut the wavey strip through the whtie paper, but leaving it attached where the stem of the flower is so it was still one piece of card.  I added the black ribbon and then mounted it on the black card.  Lastly I added the two layers of the flower and bud.

IMG_2358

IMG_2359

Thanks for dropping by and for your comments.

Have a great weekend.

Angela

Monday 14 May 2012

Embellies with a Twist - Punches and/or Dies

It is Monday again, so time for my sample card for The Crafter's Cafe Monday's Embellies with a Twist challenge.  Well done to Dawn Turley who was acknowledged for her amazing card last week for the "It Takes Two" challenge!  You can click here to see her card.

Our challenge for this week is to create a project using punches and/or dies.  I made this card for a friend who has recently graduated.

IMG_2290 Graduation

The graduate image is from The Stamping Boutique.  I discovered later that there is actually a female graduate image too. 
I printed the image and cut it out using the largest label's die I have.  I coloured the image with copics, then masked it, put the die back over it again and sponged it so the blue went around the image, leaving the white border.  I used this same technique for the sentiment tag die (but cut off the extra bits on the side).  I mounted the image on the blue card dry embossed with the Sizzix plaid folder, framed this with white card and mounted on navy blue card.  Lastly I added the gems for some embellishment.

Thanks again for visiting.  Have a great week.

Angela


Friday 11 May 2012

Three Little Chicks

Today's card was inspired by a challenge at A Blog Named Hero - Topsy Turvy - Use a sentiment for something other than a sentiment.  (Challenge #3).  I decided to use a sentiment as a border.  I also like the farm chick image from The Stamping Boutique, so thought it would be a perfect card for a baby congratulations card.

Three Little Chicks

I white embossed the Hero Arts Congratulations sentiment onto kraft around the edge.  I coloured the three chicks with a yellow copic maker, cut them out and added them onto the card with dimensionals.  I felt the kraft needed to be bordered with yellow cardstock, but the yellow card I had didn't match so I used my yellow copic marker on white card and framed it with that.  Lastly I added the white bow.

I am also entering this in
CAS-ual Fridays - CFC52 - Casual projects with birds
Our Creative Corner - OCC Colour Trifecta


Sorry I still haven't had a chance to blog about Stamp Camp and what I made.  I think about blogging about it in the evenings, but remember I don't have any photos of what I made and I really need to do that during the daylight.  I finally took some photos of what I made today, so I will try and blog about in the next few days.

Here is a  photo to give you some idea what we did.

IMG_2326

Thanks for dropping by and for your comments.

Angela


Tuesday 8 May 2012

The Crafter's Cafe Embellies with a Twist - It Takes Two!

I had a productive and enjoyable crafting weekend attending a local Stamp Camp. It was all day Saturday and Sunday.  It was lots of fun, but I was tired by the end of it.  I was very thankful to my husband who looked after the kids so I could go.  During the weekend I made many cards, a couple of other projects, learnt new techniques and made some new friends.  I hope to blog more about this in the next few days.

It is Monday again (although I am actually posting this a little late) and time for my sample creation for The Crafter's Cafe Monday Embellies With a Twist challenge.  Today the challenge is "It takes two".  Use two of something in your creation.  Please take a look and feel free to join us with any creation you make, as long as it uses embellishments and has two of something.  These is lots to see and do at The Crafter's Cafe, so I hope you will join us sometime soon.

Here is my card.

IMG_2322 with badge

The image "Summer Fun with Audrey "is from The Stamping Boutique. 
The Stamping Boutique digi stamps are created by Tracey  Malnofski.  She has an amazing range of beautiful digi stamps.  Feel free to stop by and have a look.  You don't need to use one of her images to enter. 
My card was coloured with copics.  I matted the image onto black card and added it to my yellow card.  I also used a Hero Arts sentiment Happy Birthday.  Lastly I added the punched flower and added a black gem.

I am also entering this in the Simon Says Stamp Birthday Challenge as it is their 3rd birthday!  Congratulations and Happy Birthday Simon Says Stamp Challenge blog!  

Thanks for dropping by and for your comments.

Have a great day and be blessed!

Angela